Please Note - Aug/2024:
A pandemic:
During the covid-19 lockdown, like many others, I've used my Macbook 13' mid-2018, quite a lot. And big mistake... it was always plugged in. Was it the cause of the problem or just a faulty battery, we will probably never know, but the battery started swelling badly to the point where it started deforming the case.

As I was using this laptop for my work and on time sensitive projects, no replacement battery available to do it myself, I had to find a solution. Apple was not helping, as they refuse to sell you parts, even in the middle of a lockdown, when you rely on your mac for work, and you cannot leave it 3 to 5 days in the hands of their technical service.
***Please note***: this is probably completely outdated by now, it was originally published in May 2020
Before removing:
- Deactivating kernel_task capability to slow down your computer
- Boot into recovery mode (press command+R at boot)
- Open a terminal
- Deactivate SIP: csrutil disable (keep this disabled as it will be important for restoring normal CPU speeds after)
- In single mode (command+S)
- do a backup copy of /System/Library/Extensions/IOPlatformPluginFamily.kext
- for example:
- rsync -av /System/Library/Extensions/IOPlatformPluginFamily.kext /Users/Shared/
- remove the IOPlatformPluginFamily:
- sudo rm -rf /System/Library/Extensions/IOPlatformPluginFamily.kext
- if your system is read only, just do a mount -uw / and redo the command above
- Note: you should be able to reactivate csrutil with the following command and still be able to load CPUTune:
- in recovery mode again:
- csrutil enable --without kext
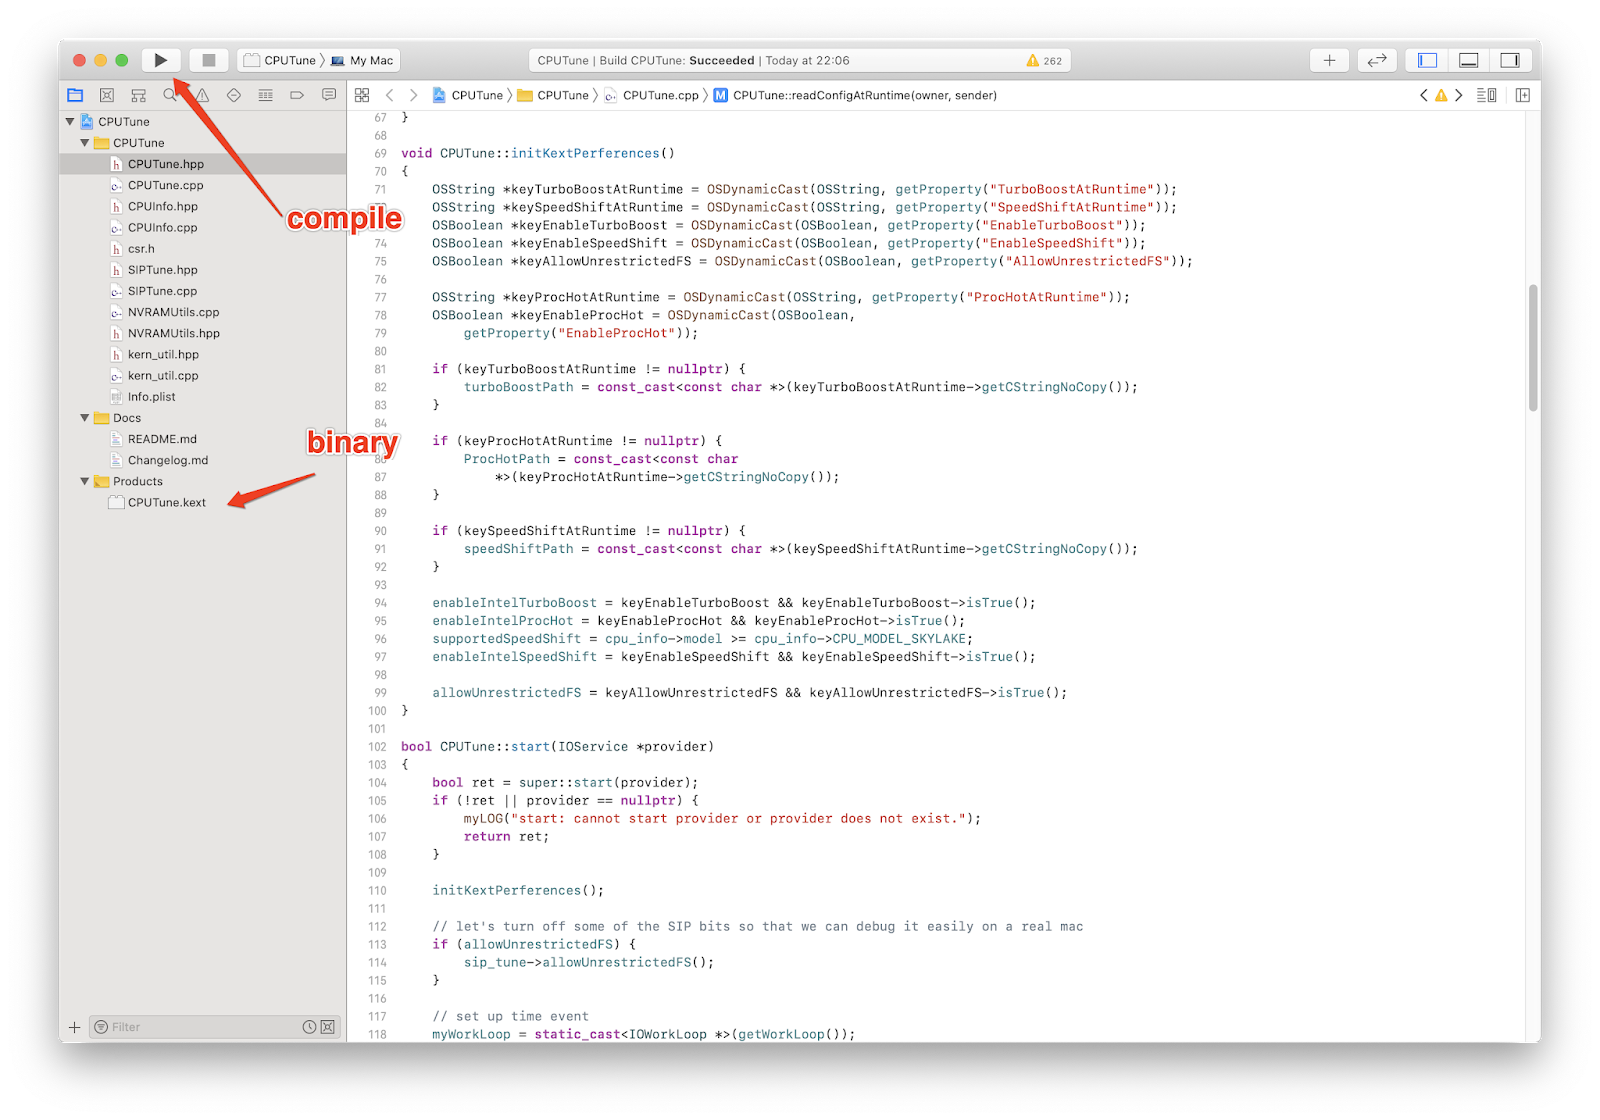
- reboot, download and compile (with XCode)
- https://github.com/syscl/CPUTune
- or get a compiled binary here (this will probably not work for you), please re-compile:
Hello everyone, I am also trying to run my macbook without a battery following the tutorial by @christophe-duc in the first post but after spending the whole day on it without any luck, I finally managed to do it on my last try before posting here and asking for a compiled version. I just want to share what helped me to spare other people some time.
I was unable to compile it. I am on MacOS 10.14.6, I had xcode 11.0 that did not work, tried to install SDK for 10.14 as per a commenter on the tutorial post, did not work, installed xcode 10.3 tried again but did not work either (always changing deployment info to 10.14).
In the end I after searching the errors I got, I found this answer on stackoverflow that opening .xcodeproj instead of .xcworkspace will cause some errors. I was trying to compile CPUTuneApp and CPUTuneCore separately, only managing to compile the latter with success.
So the proper way to compile it is:
- Use correct version of Xcode that has SDK for your OS.
- Open ONLY CPUTune.xworkspace
- Change deployment to match your OS (click blue icon on the left CPUTuneCore, select Build Settings, Levels, and then set everything in macOS Deployment target to your OS. Then on the second list directly left of the Deployment target, select the other files and also change Deployment target. Finally, select the other blue icon CPUTuneApp and repeat the steps to change deployment target for everything.
- Click Play icon/Compile and hopefully you will get build succeeded message.

After removing:
- It will deactivate the turboboost (recommended so you don't overheat your CPUs)
- Note: it should be possible to run with turboboost as BD_PROCHOT does not impact the capabilities of the CPU to send its own PROCHOT signal and cool down when needed. So far my tests all get a forced reset when I deactivate BD_PROCHOT and Turboboost is enable. If you experience something different please let me know in the comment or post on CPUTune github. So far I think it's just Apple screwing with us, there should be a way to restore normal functionalities even without a battery...
- Deactivate the BD_PROCHOT signal
- Reactivate frequency stepping if needed
- change ownership on the package:
- sudo chown -R root:wheel CPUTune.kext
- Load the kext into memory (remember csrutil should be set to disable for this to work, as the kext is not signed)
- sudo kextutil -v CPUTune.kext
- kextutil will show an error that the kext is unsigned, but it should load it anyway if csrutil is disabled, you can then check if it's loaded using
- kextstat
- You can also check in /var/log/cputune.kext.log
If you want to have CPUTune activated automatically at boot, just copy CPUTune.kext to /Library/Extensions/. Don't forget to make sure that the owner is correctly set:
sudo chown -R root:wheel /Library/Extensions/CPUTune.kext
Additional note: if you are noticing shutdowns when high CPU programs are running, it seems that it is caused due to interference from the tailspind and spindump daemon.
You can check this by opening console and looking into the diagnotistic reports and you will see cpu_resource.diag files being generated when the shutdown happened
You can disable those daemons by issuing the following commands:
After disabling those, I have been able to use my macbook pro even on CPU intensive tasks without any issues.
Additional note 2: if you want to restore Fans to normal behavior you can use Macs Fan Control it is available here: https://crystalidea.com/macs-fan-control/download


